Wednesday, August 24, 2016

CT-PTU Hello Autumn Tutorial


Hello Autumn kit by LoisD Dezignz can be found in all the below stores
Digital Designer Resources HERE
Designer Scraps HERE
Digi Divas HERE
Inspirations of Scraps Friends HERE
Low Budget Scrapping HERE
Pics for Design HERE


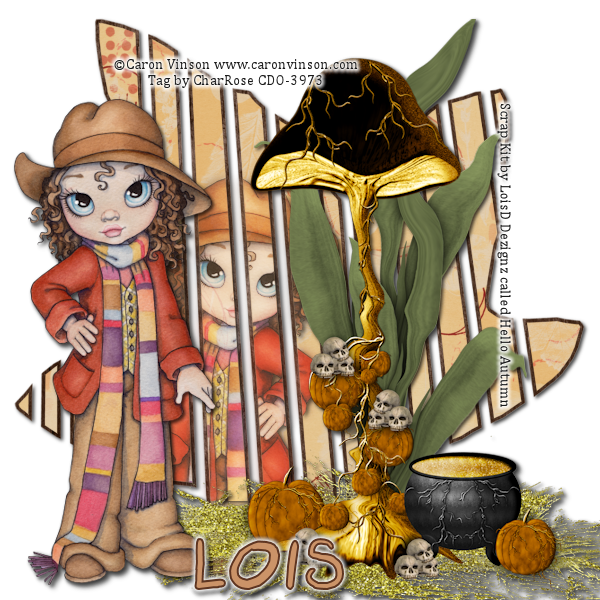
I am using a tube by Caron Vinson she is found at CDO HERE

The Slat tube used is made by ME you can download it from 
4shared HERE or box HERE

I used the font called Autumn Whispers HERE


Please Note I use PSPX6 and resizing and settings may be different. Please resize and use 
settings according to what you are happy with as each program can be different.

Drop shadow used thruout is Vertical and Hoorizontal 2, Opacity 75, Blur 5 and Color Black

Ok let's get started...

***************************************************

Open the Slat Tube in Psp or whatever program your using.

Select all-Float-Defloat
New Raster Layer....Open paper 3 
Copy and paste into selection on new layer
KEEP SELECTED
Selections-Modify-Contract 4
New Raster Layer..Open paper 9
Copy and paste into selection on new layer
Delete Orginal Black Slat

Open El 43
Copy and paste onto working image
Resize 50% and again by 40%
Remember Resizing may be different depending on your monitor and
program just look at my preview and resize to your liking.
Position el 43 to the right and drop shadow

On your second slat tube layer (the lighter colored one)
Select all-float-defloat
Open either your tube or if your tube has a half layer than use that
Resize and position portion of your tube to your liking. See my 
example for example. 
Selections-Invert
Delete on your keyboard
Select none
Drop shadow
Duplicate the tube layer
on the duplicate layer go to
Adjust-Blur-Gaussian blur 5
Layer Palette set to Overlay
Merge down the two tube layers
Lower opacity in layer pallette to around 73
Drop shadow

Copy and paste your full size tube resize to your liking
and place to the left of the image and drop shadow

Delete the White bottom layer if you have one
Merge visible
Drop shadow

I used Autumn Whispers font with a Eye candy Gradient on my name. 

Add your copyrights Save as a PNG and your done.

Thanks for doing my tut I would love to see what you do. Feel free
to send me your Tags if you wish...

Tags done by Taggers

Both below by Sharon :D


Tag by Dawn


Fall Leave Slat Tube

Here is a new Slat tube for everyone. I made it to use in a tutorial I just wrote which will be posted soon.

The preview is in PNG you may download that by right clicking and saving or I have 2 links one for 4 shared and one for Box to download PSP versions....

Please do not share send people here to download.


Box download HERE
4 Shared download HERE

Monday, August 22, 2016

FTU Clusters I made for ATP blog


I made to Clusters for a Challenge on Artistic Tag Passions
Previews below but go to ATP blog to download HERE 
Don't forget to check out the other templates while your there...


FTU Tutorial: Beautiful the way you are


I am using a Tube from Keith Garvey found on his site HERE

Template 804 by Pink Paradox productions HERE

Scrap Kit Summer Swag by Irish Princess Designs HERE

Font Gabrielle HERE

Please Note I use PSPX6 and resizing and settings may be different. Please resize and use 
settings according to what you are happy with as each program can be different.

Drop shadow I use thru out unless different than it is noted
Vertical and Horizontal 2, Opacity 75, Blur 5, and Color Black
********************************************

Open Template- Duplicate template close orginal template
Delete Credit Layer
Working from Bottom up (You can delete the White Background layer)

Layer 1:
Selections-Select all-Float-Defloat
New Raster Layer- Open Paper 3
Paste into selection on new layer
Effects-Texture Effects- Weave
Weave Settings: Gap Size 8, Width 4, Opacity 100, Weave Color white, Gap Color Black.
Select none
Delete Orginal Layer 1

Repeat above on Layer 2

Layer 3: 
Selections- Select all- Float-Defloat
New Raster Layer
Open paper 5
Copy and Paste into selections 
Delete Orginal Layer 3

Layer 4:
Selections-Select all-Float-Defloat
New Raster Layer
On Orginal paper 5 Mirror the paper
Than copy and paste into selections
Design on both layer 3 and 4 should be same if you mirrored
paper before pasting on Layer 4
Delete orginal Layer 4

Layer 5: 
Select-Select all-Float-Defloat
New Raster Layer
Open Paper 9
Copy and paste into selection
Effects-Texture Effects-Blinds
Blind Settings-
Width 5, Opactiy 100, Color Black,
Horizontal Not Checked
Light from left/top checked

Delete Orginal layer 5

Repeat above on layer 6

Layer 7:
Selections-SElect all-Float-Defloat
New Raster Layer
Open Paper 1
Copy and Paste into selection
Effects-Texture Effects-Mosiac Glass
Glass Settings:
Number of Columns and Rows 50, Glass and Edge Curvature 50, 
Grout Width 2, Grout Diffusion 50, 

Delete Orginal Layer 7

Repeat above on Layer 8

Layer 9:
Selections- Select all-Float-Defloat
New Raster Layer
Open Paper 4
Copy and paste Paper 4
Do not deselect
Copy and paste part of your tube you want, Resize and Position as
you like. Than I inverted to get rid of excess over hang.
Selections-Invert and hit delete to do above.
Select none and delete orginal layer 9
Drop shadow the tube
Lower opacity in layer pallete on tube
to around 45.

Layer 10:
Selections-Select all-Float-Defloat
New Raster Layer
Open Paper 1
Copy and paste Paper 1 into layer
Effects-3-d Effects-Inner bevel
Bevel Settings:
Bevel 2, Width 8, Smoothness & Ambience & Shininess all 0
Depth 20, Angel 315, Intensity 50, Elevation 30, Color white

Select none

Merge all your word layers together by using the merge down
starting from the top Word layer. Once they are all together
add a drop shadow.

Copy and paste full tube resize and position to the left of tag.

Open element 28 copy and paste onto working image
Resize 40%
Position to the right side of the image
Drop shadow

Open element 17 Copy and paste to working image
Resize 30% Position in front of element 28
Drop shadow and slightly angel the lips

Crop off excess My tube the legs were cut off so I cropped so you
couldn't see the cut off. 

Add your copyright and your name. I used the font Gabrielle using
colors from my tube and added a eye candy gradient glow. 

Merge visible and save as a png..

That is it your done and I hope you enjoyed my tutorial. 
I would love to see what you do feel free to send them to
me and I will showcase them here.

***Tags done doing this Tutorial*** Tag done by one of my tut testers Sharon


Tag done by BetsyE


FTU Tutorial: Nature Calls

This is an older tut from last year but the image was missing. Here is the tut now with the image in place... 
Nature Calls


It is Called Nature Calls

Tube: I used a Jasmine Becket tube from CDO

ScrapKit: Chichi's Nature calls formerly PTU now FTU HERE 


Mask: Chelles Mask 116 Her mask are located HERE just scroll down the side a bit. Her mask links are down the side.


Font: FTU Dobkin HERE 


I used Eye candy Gradient glow on my name this is not needed you can always do without.

Please Note I use PSPX6 and resizing and settings may be different. Please resize and use settings according to what you are happy with as each program can be different.

****************************************

New Image 650 by 650 with a white fill

Open Cluster_CD_NatureCalls from the kit
Copy and paste into our working image
Resize by 80%


Use your Elipse tool to draw a circle.

Stretch or shrink as needed. 
What you want is for it to cover the whole
circle behind the cluster
Convert this circle to a raster
Now on this same circle go to
Selections--Select All--Selections--Float--Selections--Defloat
Open Paper 3
New Raster Layer... Copy and Paste Paper 3 into selection 
on the new raster layer
Delete the circle


KEEP SELECTED


New Raster Layer

Copy your image and paste into selection
This will look great if your using an image 
close to what I am using.... 
Give your tube a small drop Shadow


Duplicate your layer that has the tube on it..

Move this layer above the white layer
but under everything else.
To this layer apply the Mosaic antique with below settings
Columns and Rows 50--Symmetric Checked-- Tile diffusion 70
Grout width 5-- Grout diffusion
Apply the above one more time to same layer....


I at this time cropped off some of the extra I did not need

so I could properly apply my mask.


Copy and paste Paper 10 as a new layer. Place this layer all the way to the bottom

but above the white layer.
Apply Mask 116 
Merge the mask layer...Duplicate this layer 2 times
On the bottom mask layer add a drop shadow
I used 2-2-64-5 and black


Open bird 1 copy and paste him into the working image

Resize by 40%... Place him on the leaves on the top left
corner of our image... Give same drop shadow as above


Open Bow 1 Copy and Paste into your working image

Resize by 40%... Place in the top Right corner on the edge of your
mask... Add same drop shadow.


Delete your White Layer


Add your copyrights

Add your name
I placed my name at the top in between the bird and bow 1
I placed it a bit to the right so it wasn't on top of the bird.


Save as a PNG and you are done... 

I hope you enjoyed the tutorial would love to see what you do. 
I will even showcase them here on this post..

Monday, August 15, 2016

FTU-Tutorial "Moonlight"

Please Note I use PSPX6 and resizing and settings may be different. Please resize and use settings according to what you are happy with as each program can be different.

The way I do the tutorial is just the way it worked for me. Feel free to tweak and do things in a way that
is comfortable for you. You don't have to follow this exactly..
******************************************


*******************************************
Drop Shadow I used through out was Vertical and Horizontal: 2, Opacity: 75, Blur: 5.00, and Color: Black. 

Tube was from Alena Lazreva this tube and all tubes by this 
artist can be found at CDO HERE

Scrapkit by Mizteeque and FTU on her site found HERE
This scrap kit is called Moonlight it is down the page a way.

Font I used was Moondance One I can not find this font. Not sure if it is free or not I have had it for years now. So I can not provide so sorry.

All right lets get started..
***************************

Open a 600 by 600 Image


Open element 3
Copy and paste to working image
Resize 80%
with your magic wand select the middle of element 3
Selecitons-Modify-Expand 10
New raster Layer

Moonlight Paper
Copy and paste into selection on the new layer
This layer should be after your element 3
In between Element 3 and moonlight paper make a new layer
DO NOT DESELECT YET!

Paper 15
Copy and paste into selection this should now be
in between element 3 and Moonlight paper
In your layer pallette change the layer from
Normal to Overlay.
Now you can deselect

Tube 1
Resize and Position to your liking Bottom left 
Under element 3 but above
everything else. Erase any excess over hang. 
See my image for example.
Duplicate tube layer
On duplicate go to Adjust-Blur-Gaussian blur set at 9
Change layer setting from Normal to overlay
Merge the 2 tubes together
Drop opacity to around 75
Drop Shadow

Open element 21
Resize about 80%
Move down under the circle layer
Layer and position as in picture
Open sitting tube resize to your liking
and place her like she is sitting on element 21
Drop Shadow

Open element 42
Copy and Paste into working image
Resize around 50%
Place to right of image see mine for example
Drop Shadow

Open element 14
Copy and paste
Resize about 30%
Place top left side rotate slightly
Drop Shadow

Open element 37
Copy and Paste into working image
Resize about 20%
Place over center of element 14
Drop Shadow

Delete White Layer
Merge Visible
Drop Shadow
Crop off any extra space you don't want
Add your Copyright

I added my name using two colors from the kit
Using the font Moondance one font

Save as a Png and you are done!

I would love to show off tags made doing this tutorial just
send them to me and I will put them up.

FTU Clusters Using FTU Scrap Kit "Moonlight"

FTU Cluster Frames made from a FTU Scrap kit by Mizteeque
found at  http://mizteeques.blogspot.com/
This kit name is "Moonlight"
Found HERE It is down the page a way..

Please do not claim these as your own. I made them in PSP using Mizteeque's Kit
Please send people here to download and send them to Mizteeque's link above
to download the kit. 

The pictures here are in PNG and I am uploading them to Box in PSP format for 
download as well.

3 different Clusters each with a different saying on it.. 

Download from box HERE

Pngs below... 


Enjoy!!!

Thursday, August 11, 2016

CT-PTU School Dayz Tutorial


Scrap Kit by LoisD Dezignz called School Dayz Kit available at below stores
http://digitaldesignerresources.com/shop/index.php…
http://designerscraps.com/index.php…
http://digidivas.co.uk/shop/index.php…
http://www.inspirationsofscrapsfriends.com/shop/index.php…
http://lowbudgetscrapping.com/shop/index.php…
http://picsfordesign.com/…/catalog…/sort/date/auth/LoisD.pix

Tube from CEI Sticker I bought it when they where at MyPspTubes which the store is no longer in service.

For my name I used a font called Chalk Marks its a 
free font found here

Please Note I use PSPX6 and some have had issues with the resizing in this kit. Please resize according to what you are happy with as each program can be different.

***********************************************
Dropshadow I use thru out is
Vertical and Horizontal 2
Opactiy 75
Blur 5
Color Black

***********************************************

Open a new 600 X 600 White Background. 

1. Open Frame 2:
Resize by 30%
Resize again by 50%
Sharpen
Drop Shadow

2. Open Cluster 01 this can be found in the folder with the papers. There
are 3 different Clusters I choose 01 feel free to use one of the other 2.
Resize by 30%
Resize again by 50%
Move to cover bottom of Frame
Sharpen
Drop Shadow

3. Open Paper 6
Use your magic wand and select middle of Frame
Selections-Modify-Expand 10
New layer place under frame
Copy and paste paper into selection
Select none

4. Open El (2)
Copy and Paste onto working Image
Resize 30%
Position top left corner
Drop Shadow

5. Open EL (40)
Copy and paste onto working image
Resize 30%
Resize 20%
Sharpen
Drop Shadow

Repeat with EL(39) and EL(38)

Than reference my image to make like a pencil flower and place behind the bottom
cluster!

Copy and Paste your tube, Resize, and position to your liking. 
Drop Shadow.

Add your copyright. I added eye candy glow to make my copyright more visible.

I did my name in the font called Chalk Marks and put it at a slight Angel. 

Delete white bottom Layer
Crop excess off and merge visible!
Save as a Png and you are done..

Hope you enjoyed the tutorial any issues please let me know... 

Tags made by CT Taggers 

Below by CT Tagger Dawn
 Below by CT Tagger Sharon


Monday, August 1, 2016

CT-PTU Beach Party Tutorial


Supplies Needed

Tube of choice I used Alex Prihodko Gaby found HERE 

Scrap Kit Beach Party by Lois D found at Designers Scraps, Digi Divas, Inspirations of Scraps Friends


Slat Tube by ME Download 4 Shared>> HERE or 
at Box >> HERE Please do not share this without my permission. 

Drop Shadow I used through out was Vertical and Horizontal: 2, Opacity: 75, Blur: 5.00, and Color: Black. 

I used eye Candy Glass if you don't have it you can always use a nice Bevel setting.... 

Please Note I use PSPX6 and some have had issues with the resizing in this kit. Please resize according to what you are happy with as each program can be different.

The way I do the tutorial is just the way it worked for me. Feel free to tweak and do things in a way that
is comfortable for you. You don't have to follow this exactly..
**************

Open the Seashell Slat
Selections-Select All-Selections-Float-Selections-Defloat
New Layer
Open Paper 1
Copy and paste into Selection
Select None
Eye Candy Glass with these settings
Bevel: 30.00, Smoothness: 75, Inside Marquee Checked, Edge Darkening: 30, Gradient Shading: 35, Refraction: 50,
Opacity: 0, Tinting: 50, Glass Color: White .. Select Ok.
Delete the Original Seashell Layer. 

Open El(10)
Copy and Paste to working Image
Resize 20% and again at 90%
Adjust-Sharpen
Place as top layer at bottom but slightly 
cover bottom of Slat Tube!
Drop Shadow

Open El(34)
Copy and Paste
Resize 20% and again at 70%
Sharpen
Place Sand just to side of image 
covering just part of the Water See preview for example
Erase any extra hanging to far off image
again see preview for example.
Drop Shadow

Open El(8)
Copy and paste
Resize 20%
Move just to top of Sand
Sharpen
Drop Shadow

Open El(4)
Copy and Paste
Resize 20%
Position at top as if hes flying away..
Sharpen
Drop shadow

How you use your tube depends on what tube you are using Tweak your settings
to fit your tube.. 

Copy and paste your tube
Resize to where she fits nicely next to tree. 
I wanted my lady to be like in the Sand next to the tree. 
So I duplicated my sand moved in front of tube and did some erasing
and adjusting to my liking. See Preview for an example. 

Duplicate Tube
Mirror
Resize to fit in a good position on other side of slat tube.
On Slat layer Selections-Select all-Selections-Float-Selections-Defloat
Back on Duplicated tube position tube in selection to your liking!
Selections-Invert-Hit Delete on keyboard-Select None
Drop shadow Duplicate tube and Slat layer

Delete White bottom layer if you still have it.
Merge Visible
Crop off excess to your liking
Drop Shadow once more.

Add your copyright

Text is up to you I will tell you what I used.

The font name is Dolphin
Used Size 72 Pixels and stroke 2
I added the glass effect to my font
Drop shadowed

Save as a PNG and done..

I hope you enjoyed this tutorial...

CT Tagger Example by Dawn :)

CT Tagger Examples by Sharon


Tag done by BetsyE


New Seashell Slat Tube

New Slat Tube for everyone. It is a Seashell Slat that I made to go with the Tutorial I will be posting next.. 


Download 4 shared>>HERE
or at Box>> HERE