Showing posts with label LoisD. Show all posts

Wednesday, July 19, 2017

CT-PTU Tutorial for LoisD Using her Fairy Besties

The above tag is what we will be making... 

***Supplies Needed.... 

Font Used High Tide available HERE

I used Eye Candy 4 on the Font but you do not have to have it.

Kit/Tube is part of a a kit by LoisD it includes
  • 6 fairy doll tubes - My Besties TM © Sherri Baldy
  • (each doll comes with and without wings)
  • 8 elements
  • 2 frames
  • 1 fantasy background
Available at all below Stores
DAELMANS DESIGNS - https://goo.gl/5KoBMb
DIGITAL DESIGNER RESOURCES - https://goo.gl/AkXAzv
DESIGNER SCRAPS - https://goo.gl/G112oA
DIGI DIVAS - https://goo.gl/ogE6yV
LOW BUDGET SCRAPPING - https://goo.gl/GWcayd
PFD - https://goo.gl/Bcv3w9
********************************************
Drop shadow I used thru out
Vertical and Horizontal 3
Opacity 50 Blur 5 and color Black
*******************************************
Ready Let's get started..
********************************************

Open a new Image 600 by 600

Open Element 1 Copy and paste onto working
image. 
Resize 50% and again at 50%
Position near bottom
Drop Shadow

Open Element 2 Copy and paste
Position to left Side
Resize 50% and 50% and 50%
Drop Shadow
Duplicate--Mirror--Position on Opposite Side

See my Image for example!

Open Element 3 Copy and Paste
Position to left Side
Resize 50% and 50% and 50%
Drop Shadow
Duplicate--Mirror--Position on opposite side

See My image for example!

Open Element 8 Copy and paste
Resize 50% and 50% and 50%
Place to the left side near bottom
Drop Shadow

Open Element 5 Copy and Paste
Resize 50% and 50%
Mirror
Place lower right
Drop Shadow

Choose a bestie I choose doll 1
Re 50% and 50% and 65%
Position to your liking
Drop Shadow.

I used High tide for my font
I put a Eye candy Glass
and Corona on it.

Add Copyrights
Save as a PNG and done..

Wednesday, July 5, 2017

**CT Tag using LoisD Deep Blue Sea**


**CT Tag for LoisD**
Awesome kit Called Deep Blue Sea. This kit is loaded with so many goodies and not all are shown in the preview.
Kit Has: 60 elements, 6 frames, 12 background papers


***CT Work for LoisD Dezignz***

***CT Work for LoisD Dezignz***
Awesome Kit Called  The Great Outdoors. So many choices you can use it as a nature kit or as a Fathers day kit.
Tagger Size Kit includes:
60 elements
4 frames
1 bonus quick page
12 background papers
(not all items shown in preview)

Get the kit here>>The Great Outdoors

Friday, May 12, 2017

CT Work for LoisD Dezignz Kit Mothers Love

**~~CT Work for LoisD Dezignz~~**
This kit is a mothers day kit but as you can see from the preview of my tag and the kit it can be used any time of year. Loads of goodies in it...

Scrap Kit Mothers Love available from LoisD Dezignz' stores listed below - 2 commercial use/personal use scrap kits (tagger size) - check them out and numerous other products at your favourite store:
DAELMANS DESIGNS
DIGITAL DESIGNER RESOURCES
DESIGNER SCRAPS
LOW BUDGET SCRAPPING
PICS FOR DESIGN


CT Work for LoisD Dezignz


**~~CT Work for LoisD Dezignz~~**
Scrap Kit Splish Splash available from LoisD Dezignz' stores listed below - 2 commercial use/personal use scrap kits (tagger size) - check them out and numerous other products at your favourite store:
DAELMANS DESIGNS
DIGITAL DESIGNER RESOURCES
DESIGNER SCRAPS
LOW BUDGET SCRAPPING
PICS FOR DESIGN


Sunday, February 5, 2017

CT Tags using LoisD's Kit Forever Yours

~~CT Tag~~ for LoisD Dezignz Personal Use Valentine's Day
 themed Cluster Frame package made from her Forever yours
 available in her stores which are listed below - click on the 


Wednesday, September 28, 2016

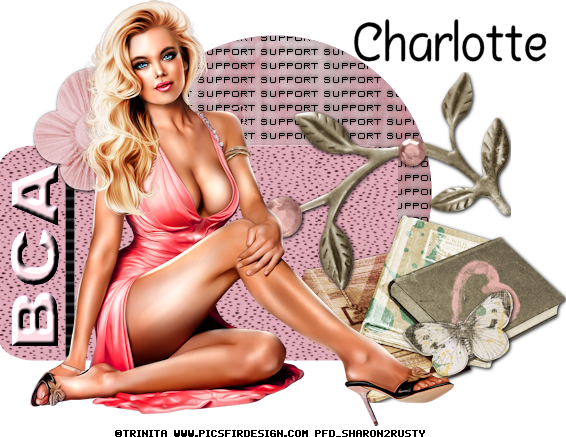
CT-PTU Tutorial BCA Support


ScrapKit by LoisD called City of Love available at below sites

Tube is one from Beehive she is no longer in business and this is the last information I have for her on my tag information.

BCA Template HERE 

Font Called Chalk Marks found HERE 

Resizing and settings may be different. Please resize and use 
settings according to what you are happy with as each program can be different.

Drop shadow used thru out is Vertical and Horizontal 2, Opacity 75, Blur 5 and Color Black.

Make it your own.... 
****************************************

Open the BCA Template 2
Shift + D to duplicate and delete the orginal
Go to image- Canvas Size 600 by 600

Start on bottom with Grey Circle
Selection-float-Selection-Defloat
New Raster Layer Copy and paste into selection paper 5
Delete orginal grey layer
select none

On word layer
selection-float-selection-defloat
New raster layer and flood fill with black
Delete orginal word layer
Select none

On Pink rectangle layer
Selections-select all-float-selections-defloat
New Raster Layer
Copy and paste paper 10 into selection
Delete orginal pink layer

On Thin white line layer
Selections-select all-float-selections-defloat
New raster layer
Copy and paste paper 3 into selection
Delete orginal white line layer

Magic wand inside each letter BCA
Selections-modify-expand by 2
New raster layer Place this layer under the pink square
Effects-3D EFfects-Inner Bevel
With below settings


Open Element 3
Copy and paste Resize 50%
Place right bottom corner
drop shadow

Open Element 8
Copy and paste Resize 50%
Place at edge of book
Drop shadow

Open Element 1
Copy and paste Resize 50% and again at 50%
Place upper left corner
Drop shadow

Open Element 2
Copy and paste Resize 50% and again at 50%
Place corner of books
Drop shadow

Copy and paste Tube resize and place to your liking
Drop shadow
Merge visible and drop shadow
Add your copyright

Add your name I used Chalk marks and gave it a eye candy
gradient glow.

Save as a PNG and your done.
I hope you liked the tut and I would love to see what you do.

Tags by Sharon made doing this Tutorial


Wednesday, September 21, 2016

CT-PTU Spookalicious Tutorial


**Scrap kit used by LoisD called Spookalicious

DDR

DESIGNER


DIGI


IOS
LOW BUDGET
PFD


**Tube by ©Maryline Cazenave available at CDO HERE

**Template made by me get HERE Free

**Font used was Chalk Marks found HERE

Resizing and settings may be different. Please resize and use 
settings according to what you are happy with as each program can be different.

Drop shadow used thru out is Vertical and Horizontal 2, Opacity 75, Blur 5 and Color Black.

Make it your own.... 
****************************************
Lets get started

Open the Pumpkin Template
Selections-Float-Selections-Defloat
New Raster Layer on working image
Open Paper 2
Paste into selection on the new layer
Effects-3D Effects-Inner Bevel with below settings
Select none

Open Element 33
Resize to your liking view my image to see you want it to
fit behind the 2 eyes.

Open Element 3
On the template the orange layer
Selections-Select all-Selections-Float
New Raster Layer and Copy and paste into Selection

Open Paper 5
On template Magic wand in the middle of the nose. Selections-Modify-Expand 4
New raster layer Place layer under template layer
Paste into selection

Repeat above on the Mouth!

On Mouth and Nose Layer add noise
Dot in Uniform and Noise 50
and Monochrome NOT checked

Open Element 28
Resize around 50% See my image
Place at base of Stem
Drop Shadow

Open Element 21
Copy and paste to image resize to a small
spider and place in 4 random spots on the web
See my image for an example.

Copy and paste your tube Resize to your liking
and place to the left of the image
Drop Shadow

Open Element 5
Copy and paste resize around 50% place to the
right of the image
and Drop shadow

Delete the white layer
Crop off Excess
Merge Visible
Drop shadow

Add your copyright.

I used Chalk mark text with a small Eye candy
gradient glow and drop shadow

save as a PNG and your done!

I would love to see what you do.... 

Tags by Sharon CT Tut Tester


Monday, September 5, 2016

CT-PTU Boo Tutorial


Scrap Kit by LoisD you can purchase the kit at the 
following stores Digital Designer Resources HERE
Designer Scraps HERE
Digi Divas HERE
Inspirations of Scraps Friends HERE
Low Budget Scrapping HERE
Pics for Design HERE

Tube by Veleri availble at Picsfordesign www.picsfordesign.com

I used Font Ink and Bones get it here http://www.dafont.com/inkandbones.font

Resizing and settings may be different. Please resize and use 
settings according to what you are happy with as each program can be different.

Drop shadow used thru out is Vertical and Horizontal 2, Opacity 75, Blur 5 and Color Black.

Make it your own.... 

Let's get started

Open a new image 600 by 600

Open Element 5
Copy and paste to working image
Resize around 50% see my image for example.
Select middle with your magic wand
Selections-Modify-Expand by 2

New Raster Layer Place this layer under Element 5
Open paper 3 copy and paste into selection
DO NOT DESELECT
Selections-Invert
Selections-float-Selections-Defloat
Open Paper 1
Copy
Paste into selection
Keep this layer on top of the others

Copy and Paste Element 12
Resize until it looks right with placement
See my image for example
Sharpen and Drop shadow

Copy and paste Element 14
Resize until it looks right with placement
See my image for example
Sharpen and Drop Shadow

Copy and paste Tube
Resize place to left of image
Sharpen and Drop shadow

Delete White layer if you still have it

Open Element 1 
Copy and paste and Mirror
Resize to your liking Place to right of tag!

Merge Visible
Crop off Excess if needed
Add copyrights

Add your name
I used Ink and Bones Font
I used a solid color for the main
than added a Eye candy Glow to it
with a Basic Drop shadow

Save as a Png

I would love to see what you do if you do this tutorial.
Thanks for trying it.

Tags done by Sharon Doing the above Tutorial


Wednesday, August 24, 2016

CT-PTU Hello Autumn Tutorial


Hello Autumn kit by LoisD Dezignz can be found in all the below stores
Digital Designer Resources HERE
Designer Scraps HERE
Digi Divas HERE
Inspirations of Scraps Friends HERE
Low Budget Scrapping HERE
Pics for Design HERE


I am using a tube by Caron Vinson she is found at CDO HERE

The Slat tube used is made by ME you can download it from 
4shared HERE or box HERE

I used the font called Autumn Whispers HERE


Please Note I use PSPX6 and resizing and settings may be different. Please resize and use 
settings according to what you are happy with as each program can be different.

Drop shadow used thruout is Vertical and Hoorizontal 2, Opacity 75, Blur 5 and Color Black

Ok let's get started...

***************************************************

Open the Slat Tube in Psp or whatever program your using.

Select all-Float-Defloat
New Raster Layer....Open paper 3 
Copy and paste into selection on new layer
KEEP SELECTED
Selections-Modify-Contract 4
New Raster Layer..Open paper 9
Copy and paste into selection on new layer
Delete Orginal Black Slat

Open El 43
Copy and paste onto working image
Resize 50% and again by 40%
Remember Resizing may be different depending on your monitor and
program just look at my preview and resize to your liking.
Position el 43 to the right and drop shadow

On your second slat tube layer (the lighter colored one)
Select all-float-defloat
Open either your tube or if your tube has a half layer than use that
Resize and position portion of your tube to your liking. See my 
example for example. 
Selections-Invert
Delete on your keyboard
Select none
Drop shadow
Duplicate the tube layer
on the duplicate layer go to
Adjust-Blur-Gaussian blur 5
Layer Palette set to Overlay
Merge down the two tube layers
Lower opacity in layer pallette to around 73
Drop shadow

Copy and paste your full size tube resize to your liking
and place to the left of the image and drop shadow

Delete the White bottom layer if you have one
Merge visible
Drop shadow

I used Autumn Whispers font with a Eye candy Gradient on my name. 

Add your copyrights Save as a PNG and your done.

Thanks for doing my tut I would love to see what you do. Feel free
to send me your Tags if you wish...

Tags done by Taggers

Both below by Sharon :D


Tag by Dawn