Showing posts with label CT-PTU Tutorials. Show all posts

Tuesday, December 19, 2017

♥♥CT-PTU-Tut for Tadd (Santa)♥♥

CT TADD with her Kit "Santa"
Get this kit at PicsForDesign HERE
  • Kit has
  • 170 elements, 5 frames
  • 12 papiers 800X800 pixels

Tube used is Maryline Cazenave tube 44-3 available at CDO
Get it HERE

Drop shadow used through out Vertical and Horizontal 4 and Opacity 50 and Blur 5
Color Black. You can use your own this is just what I used.

Definitions used thru tutorial: WI= Working Image and 
DS= Drop Shadow and CP= Copy and Paste

This tutorial assumes you have a working knowledge
of psp and how to use it.

Preview of what we are making..

**********************************
Disclaimer: This tut is not a copy of any other person
or file. I have written this on my own. Please do not share
or take without my permission. Linking to it is fine without
contacting me but that is it..
************************************

Open New image 600 by 600 we will resize later.

Open frame 4 CP to WI Resize 70%
Move towards upper right corner

Open Paper 3 
CP .. Use your magic wand select inside small lower right
corner frame.. Selections--Modify--Expand 5
New Raster layer under frame
Paste into selection.

Open Paper 8
CP .. Use your magic wand select inside upper Right
Corner.. Selections--Modify--Expand 5
New Raster layer under frame
Paste into selection. 

Open Paper 12
CP .. Use your magic wand select inside Side Left..
Selections--Modify--Expand 5
New Raster layer under frame
Paste into selection.

Open Element 11
CP to WI and Resize 50% and 70%
Place left part of Frame and DS

Open Element 24
CP to WI and Resize 50% and 70%
Place Lower right Frame and DS

Open Element 133
CP to WI and Resize 50% and 70%
Place Upper Right Frame and DS

Open Element 32
CP to WI and Resize 70%
Place bottom center and DS

Open Element 58
CP to WI and Resize 50%
Place top left Corner and DS

Open Element 44
CP to WI and Resize 50%
Place middle right side and DS

Open Elements 6 & 7 & 8
CP all to WI..
Resize Each one 50% and 50%
Arrange in a cluster Bottom right Corner and DS

Open Element 119
CP to WI and Resize 50%
Place Center Top
Sharpen Image and DS

Open Element 135
CP to WI and Resize 50% and 70%
Sharpen and Position near bottom and DS

CP your Tube Resize and adjust to  your liking and DS

Delete Your White Layer
Merge Visible and DS

Add  your Copyrights

I used a font called Santas Sleigh Full and 2 colors from my
image. 

Sunday, December 17, 2017

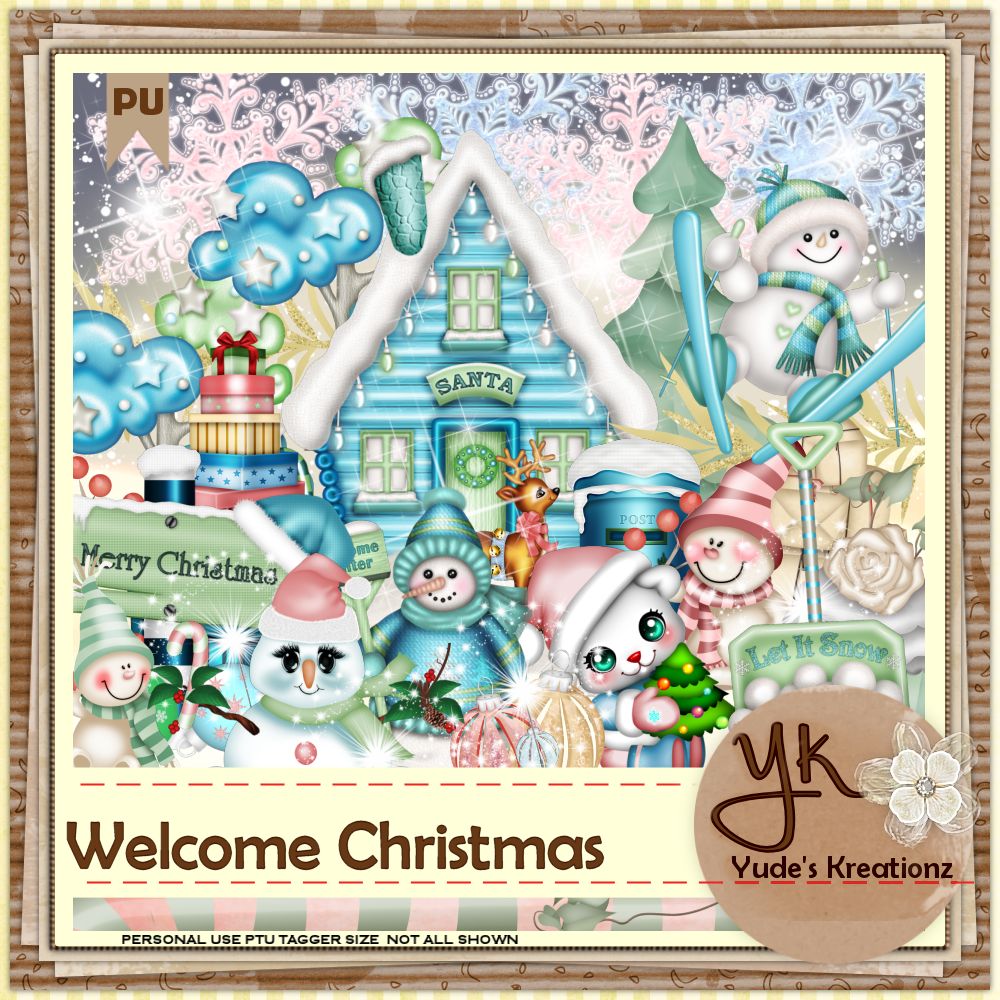
♥♥CT -PTU Tutorial for Yude's Kreationz Using her Welcome Christmas♥♥

 CT for a Kit by: Yude's Kreationz called Welcome Christmas
Kit has 95 Elements and 8 Papers and
is loaded with goodies.. Preview of kit below
Get the kit HERE

Kit used Welcome Christmas see information above.

Tube Used Jamie Kidd tube called Mittens
Tube is found at CDO HERE


Drop shadow used through out Vertical and Horizontal 4 and Opacity 50 and Blur 5
Color Black. You can use your own this is just what I used.

Definitions used thru tutorial: WI= Working Image and 
DS= Drop Shadow and CP= Copy and Paste

This tutorial assumes you have a working knowledge
of psp and how to use it.

Refer to my image for placement if need be or go your own way make I yours :D
Preview of what we are making

**********************************
Disclaimer: This tut is not a copy of any other person
or file. I have written this on my own. Please do not share
or take without my permission. Linking to it is fine without
contacting me but that is it..
************************************
Ok Let's get started..

Open a New image 600 by 600 you can resize later.

1.) Select preset shape Circle set Width to 5.00. Choose 2 colors from your tube.
Draw a Circle on your working image
Objects- Align- Center in canvas.
>>Open Paper 8
Copy and paste on paper
On WI Select center of circle with magic wand
New Raster Layer and make sure you are on the new layer
CP into Selection.

>>Open Paper 3
CP paper 3
Back on WI and on orginal circle layer
Selections invert-Selections float-Selections defloat
New layer- Make sure your on the new layer
Paste into Selection.
I used eye candy glass on this layer with basic settings
and white as color. You could leave it as is or do your own 
twist on it.

Delete the orginal circle later.
DS Outer frame Layer
Outer edge frame on top and Picture on bottom
See example below


>>Open Element 27 CP to Image
Resize 50% Position Upper Middle of Circle and DS

>>Open Element 1 CP to Image
Resize 50%  Position to right of House and DS

>>Open Element 7 CP to Image
Resize 50% and again at 80%
Postion to left of house and DS

>>Open Element 20 CP to Image
Resize 50% and 90% 
Position behind Reindeer and DS

>>Open Element 3 CP to Image
Resize 50% 
Place near bottom and DS

>>Open Element 2 CP to Image
Resize 50% and 80%
Position Near Top and DS

>>Open Element 56 CP to Image
Resize 50% and 80% and 80%
Position under frame and Merry Chrsitmas banner
Near bottom Left

>>Open Element 24 CP  to Image
Resize 50% and 80%
Position Lower right

>>Open Element 12 CP to Image
Resize 50% and 50%
Position Upper right and DS

>>Open Element 14 CP to Image
Resize 50%  and 50%
Position upper right next to element 12 and DS

Merge ONLY Element 12 and 14. Duplicate the Merged
Mirror and Place upper Left.

>>Open Element 54 CP to IMage
Resize 50% and 70%
Position in front of deer and DS

Crop and Resize to your liking at this point!

Add Tube of choice, Resize, Drop shadow and Place to your Liking.
Delete White Layer, Merge Visible, and DS
Add Copyrights

I used the Font Merry Christmas flakes with 2 colors from my tube.
Add Drop shadow and place to your liking... 

Save as a PNG and your done!!


Wednesday, July 19, 2017

CT-PTU Tutorial for LoisD Using her Fairy Besties

The above tag is what we will be making... 

***Supplies Needed.... 

Font Used High Tide available HERE

I used Eye Candy 4 on the Font but you do not have to have it.

Kit/Tube is part of a a kit by LoisD it includes
  • 6 fairy doll tubes - My Besties TM © Sherri Baldy
  • (each doll comes with and without wings)
  • 8 elements
  • 2 frames
  • 1 fantasy background
Available at all below Stores
DAELMANS DESIGNS - https://goo.gl/5KoBMb
DIGITAL DESIGNER RESOURCES - https://goo.gl/AkXAzv
DESIGNER SCRAPS - https://goo.gl/G112oA
DIGI DIVAS - https://goo.gl/ogE6yV
LOW BUDGET SCRAPPING - https://goo.gl/GWcayd
PFD - https://goo.gl/Bcv3w9
********************************************
Drop shadow I used thru out
Vertical and Horizontal 3
Opacity 50 Blur 5 and color Black
*******************************************
Ready Let's get started..
********************************************

Open a new Image 600 by 600

Open Element 1 Copy and paste onto working
image. 
Resize 50% and again at 50%
Position near bottom
Drop Shadow

Open Element 2 Copy and paste
Position to left Side
Resize 50% and 50% and 50%
Drop Shadow
Duplicate--Mirror--Position on Opposite Side

See my Image for example!

Open Element 3 Copy and Paste
Position to left Side
Resize 50% and 50% and 50%
Drop Shadow
Duplicate--Mirror--Position on opposite side

See My image for example!

Open Element 8 Copy and paste
Resize 50% and 50% and 50%
Place to the left side near bottom
Drop Shadow

Open Element 5 Copy and Paste
Resize 50% and 50%
Mirror
Place lower right
Drop Shadow

Choose a bestie I choose doll 1
Re 50% and 50% and 65%
Position to your liking
Drop Shadow.

I used High tide for my font
I put a Eye candy Glass
and Corona on it.

Add Copyrights
Save as a PNG and done..

Thursday, December 15, 2016

CT-PTU Tutorial: Oh Oh Oh Merry Christmas


Scrap kit is Oh Oh Oh Merry Christmas by TADD (Twin Angel and Devil Designs)
There is so much in this kit and it can be purchased at below stores
http://digigraphicdesigns.com/
http://picsfordesign.com/
http://sensibilityscrapping.com/ 

Tube is by Melissa Dawn and can be purchased from CDO HERE

The Font used is Santa Sleigh and is FTU can get it HERE

Drop shadow used thru out is Vertical and Horizontal 2, Opacity 75, Blur 5 and Color Black. Twice I used White rather than black. 

Make it your own.... 
****************************************
Open a new image 600 by 600 with a white background

Open frame 4 
Copy and paste to your working image resize 80%

Open Paper 7
Use your magic wand and select middle of your frame
Selections-Modify-Expand 6
New Raster layer and place under frame
Copy and paste into selection paper 7
Select none. The paper layer should be under the
frame layer.

Open Element 3
Copy and paste and resize 50%
place lower left corner under the frame

Open Element 7
Copy and paste and resize 50% and again at 70%
Place top right Drop shadow
Duplicate-Mirror-Place top left

Open Element 11
Copy and paste Resize 50% Drop shadow
Place top center behind the other 2 bells

Open Element 20
Copy and paste Resize 50% and again at 50%
Place lower right and drop shadow

Open Element 89
Copy and paste Resize 50% and again at 50%
Place lower right and Drop shadow
Duplicate-Mirror and place bottom left

Open Element 114 
Copy and paste Resize 50% and 50% 
Drop shadow Place on top of house

Copy and paste tube your using
Resize and place to your liking
Drop shadow

Delete the white layer
Crop and resize tag to your liking
Merge visible
Sharpen image and drop shadow
Add Copyright
Add your name I used Santa's sleigh

I hope you enjoyed this tutorial I would love to see what you do..... 


Monday, November 28, 2016

CT-PTU Tut: Pretty Garden


Kit is Pretty Garden by TADD (Twins Angel & Devil Designs) and Available at the below Stores. There is so much in this kit it is awesome..
http://digigraphicdesigns.com/
http://picsfordesign.com/
http://sensibilityscrapping.com/ 

Tube is by Maryline Cazenave and she is at Creative design Outlet (CDO) HERE

Font used was Chalk Marks. You can find it HERE Free

Drop shadow used thru out is Vertical and Horizontal 2, Opacity 75, Blur 5 and Color Black. Twice I used White rather than black. 

Make it your own.... 
****************************************
Open new Image 600 by 600 image with a white background

Open Element 28.. Copy and paste..
Resize 90% and move towards bottom.. Drop Shadow

Open element 63... Copy and paste...Resize 90%
Place behind element 28.. Duplicate Element 63 and Drop shadow

Open Element 15... Copy and paste... 
Resize 50% and again at 70%
Place on top of fence and Drop shadow

Open element 2... Copy and paste..
Resize 50% and Drop shadow
Place bottom right

Open element 81... Copy and paste...
Resize 50%... Place behind Rainbow Drop shadow

Copy and paste your tube.. 
Resize and place to your liking...
Drop shadow..

Crop your image.. Merge visible....
Drop shadow one more time...

Add your name and Copyrights..

Save as a PNG and you are done..

I hope you enjoyed this tutorial. I would love to see what you do..

Wednesday, November 9, 2016

CT-PTU Tutorial Glamorous


Kit is Glamorous and Naught by TADD (Twins Angel & Devil Designs) and Available at the below Stores
http://digigraphicdesigns.com/
http://picsfordesign.com/
http://sensibilityscrapping.com/ 

Tube is by Fiodorova Maria Called Elsa and available at Picsfordesign

Font used was Mama Script. I don't know where I got this but when I searched online I could not find it so sorry no link.

Drop shadow used thru out is Vertical and Horizontal 2, Opacity 75, Blur 5 and Color Black. Twice I used White rather than black. 

Make it your own.... 
****************************************
Open new Image 600 by 600 image with a white background

Open Frame 1 copy and paste into working image
Resize by 70%
Move slightly to the right
Select middle of frame
Selections-Modify-Expand 10
New Raster Layer
Copy and paste into selection paper 1
I had a half tube with my tube and I used the
half tube for the next section
New Raster layer under the frame
Copy and paste into selection the half tube.
Select None

Element 7
copy and paste Resize 50%
Drop Shadow
Place bottom Right

Element 5
Copy and paste Resize 50% and again at 80%
Drop Shadow
Place bottom right

Element 14
Copy and paste Resize 50% and again at 80%
Drop Shadow
Place bottom Right

Element 10
Copy and paste Resize 50%
Mirror and Drop Shadow
Place Top Right
Duplicate--Mirror
Place top left

Element 126
copy and paste Resize 50% and again at 80%
Drop shadow Place bottom right corner

Copy and paste your full tube
Resize to your liking place left side of image
Drop shadow

Delete white layer and resize whole image about 90% or 95%
Sharpen if needed....

Add your Copyrights... 

Add your name...I used Mama Script with a Drop shadow.

I hope this was easy to follow and I would love to see what you do....... 


Tuesday, November 1, 2016

CT-PTU Tutorial Magical Forest


Kit is Magic Forest by TADD (Twins Angel & Devil Designs) and Available at the below Stores
http://digigraphicdesigns.com/
http://picsfordesign.com/
http://sensibilityscrapping.com/ 

Tube is Caron Vinson and she is available at CDO

Font Forget Me Not and Available for Free HERE

Drop shadow used thru out is Vertical and Horizontal 2, Opacity 75, Blur 5 and Color Black. Twice I used White rather than black. 

Make it your own.... 
****************************************
Open new image 600 by 600 white background

Copy and paste Frame 3 
Resize 80%
Move slightly to top
Select inside frame with your magic wand
Selections-Modify-Expand 8
New Raster layer place it under the frame
Copy and paste into selection Paper 9
Select none
Adjust-Sharpness-Sharpen

Copy and paste Element 44
Resize 50% and place bottom Left
Drop Shadow

Copy and Paste Element 15
Mirror
Resize 70% and place bottom right
Drop Shadow

Copy and paste Element 9
Move below all layers but above your white background
Drop shadow

Copy and paste Element 41
Resize 50% and again at 80%
Place behind the frame layer and near the bottom
Drop Shadow

Copy and paste Element 60
Resize 50%
Place along top of image
Drop shadow

Copy and paste Element 52
Resize 30%
Place along upper part of image
Sharpen and Drop shadow

Add your Tube Resize and position as you like
I placed mine where she was sitting on the stump
Drop shadow

Crop and resize the image to your liking..

Delete your White Background and Merge visible
I gave the whole tag one more drop shadow.

Add your name I used the font Forget Me Not
and added a Eye Candy glow.

Add your copyrights Save as a PNG and your done..
Hope you like the tut and it was easy to follow.
Lots of possible variations with this wonderful kit.


Wednesday, October 26, 2016

CT-PTU Tutorial Diabla


CT-PTU Tutorial Using a kit by Designs by Joan Called Diabla Collab Its part of the Diabla Collab available at  Scraps N Company

Tube is by Stan Duddin available at Pics for design

I used FFVortex font and can't find it anywhere for free.

Drop shadow used thru out is Vertical and Horizontal 2, Opacity 75, Blur 5 and Color Black. Twice I used White rather than black. 

Make it your own.... 
****************************************
Open Element 35
Copy and paste and resize 80%
Place about middle 
Select middle with Magic Wand
Selections-Modify-Expand 8
Open Paper 2
New Raster Layer on working image
Copy and Paste into selections
Place under element 35
Select none.

Open element 44
Copy and paste resize 60% and again at 70%
Drop shadow with white rather than black

Open element 75
Copy and paste resize 50%
Place lower right and drop shadow with white rather than black

Open Element 77
Copy and paste resize 50%
Place under Devil 
Move towards top

Open element 14
Copy and paste Resize 50%
Move to bottom
Drop Shadow

Open element 39
Copy and paste resize 70% and again at 70%
Move to right side
Duplicate and mirror and move this to the left side
Drop shadow both

Add your tube Resize and place to the left
drop shadow

Delete the white background

Crop and resize to your liking.
Add your copyright information
and your name..
I used the font FFVortex with a Eye candy glow

Save as  PNG and you are done..

Tuesday, October 11, 2016

CT-PTU Pink October Tutorial


CT-PTU Tutorial Dark Night using the Scrap kit by TADD called
Dark Night availble at the following stores 

Tube from Joel Adams and I got it at Creative Design Outlet (CDO)

I used SF Foxboro Script Extended you can get it HERE.

I did use the filter Xero Porcelain available HERE for free

Resizing and settings may be different. Please resize and use 
settings according to what you are happy with as each program can be different.

Drop shadow used thru out is Vertical and Horizontal 2, Opacity 75, Blur 5 and Color Black.

Make it your own.... 
****************************************

New Image 600 by 600 with white background

Copy and paste frame 6
Resize 80% and move to bottom
Drop Shadow
Use your magic wand and click inside each center of the frame
Holding the shift key you can select the first and than the second
and so on.
Selections-Modify-Expand 8
New Raster Layer Place it under frame
Open Paper 6 and copy and paste into selection
Select none
Now select the middle of the middle frame with your wand
Selections-Modify-Expand 8
Copy and paste the part of the tube you want in that center
Selections-Invert and hit delete on the keyboard
Select none
Duplicate this tube layer and than on the duplicate layer
Blur-Gaussian Blur
Effects-Plugins-Zero-Porcelian
In layer palette select soft Light
Merge just the two tube layers together
In layer palette select Lumancy (Legacy)

Now on to the elements.... 

Element 57
Copy and paste.. Resize until it fits in left side frame
Drop shadow

Element 13
Copy and paste... Resize until it fits in right side of frame
Drop Shadow

Element 6
Copy and paste... Resize 50% and again at 70%
Place over element 6
Drop shadow

Element 7
Copy and paste... Resize 50% and again at 50%
Place to left and Drop shadow

Element 32
Copy and paste... Resize 50%
Drop shadow and place over image to your liking

Element 24
Copy and paste Place under all but above white layer
Drop shadow

Element 2
Copy and paste... Resize 50% and again at 50%
Place on a bottom corner
Duplicate and move duplicate to other corner
Drop shadow both

Copy and paste your tube Resize and place to your liking.
Drop shadow... Resize and crop to your liking
Delete the white layer

Merge visible and Drop shadow one more time... 

Add your copyrights..

Add your name I used SF Foxboro Script extended 
I added a Drop shadow to it and Eye candy glow

Save as a PNG and you are done...

I hope you enjoyed this tut. I would love to see what you do.