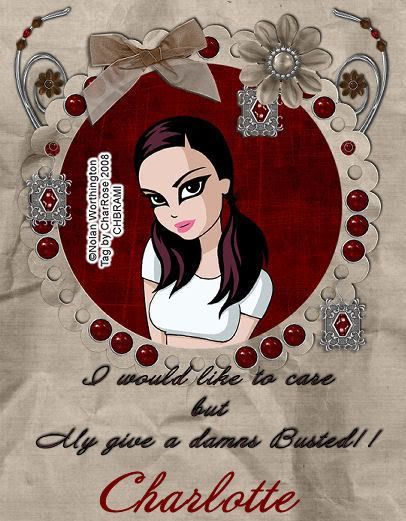
I would like to Care
This tutorial was written by Charlotte/Redrose. This may not be reproduced. Do not copy and pass the tutorial I have written around groups. You may link to it and if there are any issues with the tutorial Let me know on site or Private Message me. All images and examples were made by Charlotte/CharRose and are NOT to be snagged or used anywhere else. Any Resemblance to another tutorial is purely coincidental.
Written on July 6, 2008
Heres what we will be making below......
SUPPLIES NEEDED:
You will need PsP of course 

Tube of your choice. I can not share the tube I used as it is licensed thru Artistic minds Inc http://artisticmindsinc.com/. Do not use this tube without the proper license.
Font of your choice
Get the Love Actually Scrap free Kit here By Lisa...Go to where she says My Older kits and click on here and than scroll down to SSLisa-Love Actually.zip... Click it and download it. Tyvm Lisa Lovely kit. Or you can of course use a scrap kit of your choice.
Saying I used: I would like to care but my give a damns busted. You may colorize the one I included if you wish.
Ok Ready lets begin.......
Open one of the frames from Lisa's scrap kit. Duplicate and close the original.
Resize by 95%.
With your magic wand Click on the inner part of the circle.
Go to Selections-Modify-Expand by 6 and click ok
Choose a paper of choice from Lisa's kit and copy and paste it to your image as a new layer.
Move it under your circle frame. Than go to Selections and invert.
Hit delete on your keyboard.
Copy and paste your tube and place it in the circle frame the way you want it and than with your tube layer active hit delete again on keyboard to delete the excess tube hanging over.
Pick one of the beaded curls in the Embellishments folder and copy and paste it to your tag.
Resize as needed and than duplicate and mirror. Position one on either side of the circle frame. See my tag for example. I resized about 50 % but use your own judgment. I also choose one of the flowers and placed in the top corner. You can choose to do this or not up to you.
Merge visible and add a new layer.
Now make sure your merged layer is active and resize by 85%.
You can add my Word art or wording you wish to use. I used…….. I would like to care but my give a damns busted!
Hide your bottom blank layer and merge visible the rest. Use your crop tool and crop off all the extra around just leave enough room for your name.
On your bottom layer use a color, gradient or paper of choice and copy and paste it or flood fill it. I used another paper from Lisa's kit. Add a drop shadow of choice if needed to your layer with your tube and frames on it.
Merge visible……..
Add your Credits and your name…….
Crop any extra off at this time if need be.
Save and you are done……..
Ty for doing my tutorial. I hope you enjoyed it. Was just a quickie in between School assignments.
Ty for doing my tutorial.
I hope you enjoyed this tutorial any question


No comments:
Post a Comment