
This tutorial was written by Charlotte/CharRose. This may not be reproduced. Do not copy and pass the tutorial I have written around groups. You may link to it and if there are any issues with the tutorial Let me know. All images and examples were made by Charlotte/CharRose and are NOT to be snagged or used anywhere else. Any Resemblance to another tutorial is purely coincidental.
Written on May 28, 2008
Supplies needed
Psp (I used 10 can be done in earlier versions)
Mask by Chelle (included in supplies) Her site is Down if
anyone finds a replacement let me know.
anyone finds a replacement let me know.
Tube of your choice you can get the one I used by visiting B.A.M.A tubes here (Also included in my supplies) ©Bobbie Allen www.bamacreations.yuku.com
I also used Bobbies Apple box (Also included in supplies)
Get Supplies here
Ok are we ready???
-----------------------------------------------------------------------
-----------------------------------------------------------------------
Open New image 450 by 450
Pick a color from your tube. Floodfill your background with this color.
Go to Layers-New mask Layer-from image
Choose WSL_Mask80
Source Luminance
Invert mask
and click ok.....
Merge Group
Choose a color from your tube for foreground. Nul for background color.
Choose your rectangle tool.
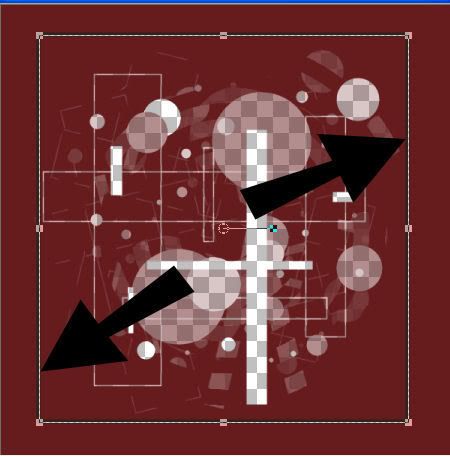
Draw a rectangle around your mask like below.
Convert to a raster layer.
Duplicate this layer.
Using your pick tool (might have a different name in earlier versions)
Stretch this layer to be a little bigger than your first rectangle.
Like below

Now with your magic wand click on the rectangle that you stretched out.
Apply the below bevel setting.
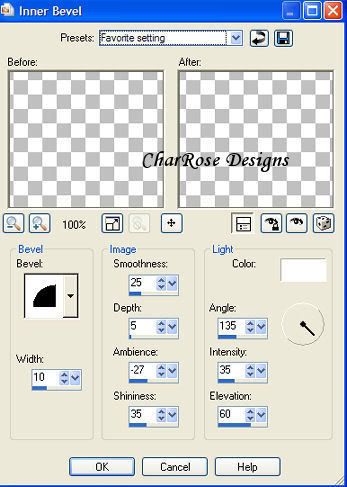
Click on your other rectangle layer and apply the same inner bevel setting.
With your magic wand select in between your 2 Rectangles . From the inner square out should be selected.........
Now click on the bottom Mask layer. Apply the penta.com dot and cross with below settings
Amount:72
Cross Distance: 10
Cross Width: 2
Select none.
If using bobbies tube you can use your freehand tool and select the lady away from the copyright. REMEMBER TO READD THE COPYRIGHT.
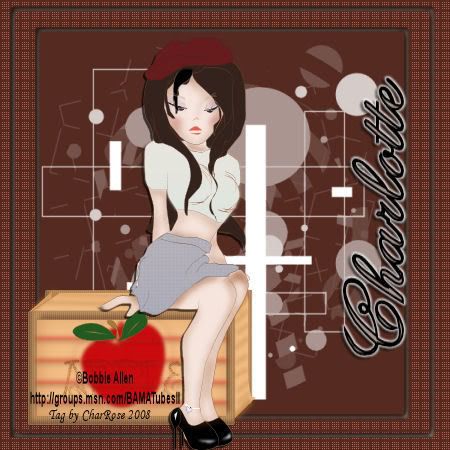
Place your tube and what she is sitting on. See my tag for a example.
Add a dropshadow of choice to the tube/tubes.
Add your name as you choose.
Add your copyrights/credits.
Merge all flatten
Save and you are done.
Ty for doing my tutorial. I hope you enjoyed it.
No comments:
Post a Comment